Desert Online General Trading LLC
Dubai, United Arab Emirates
Desert Online General Trading LLC
Dubai, United Arab Emirates

⚙️ Power your HVAC with precision and reliability — control that means business!
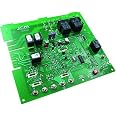
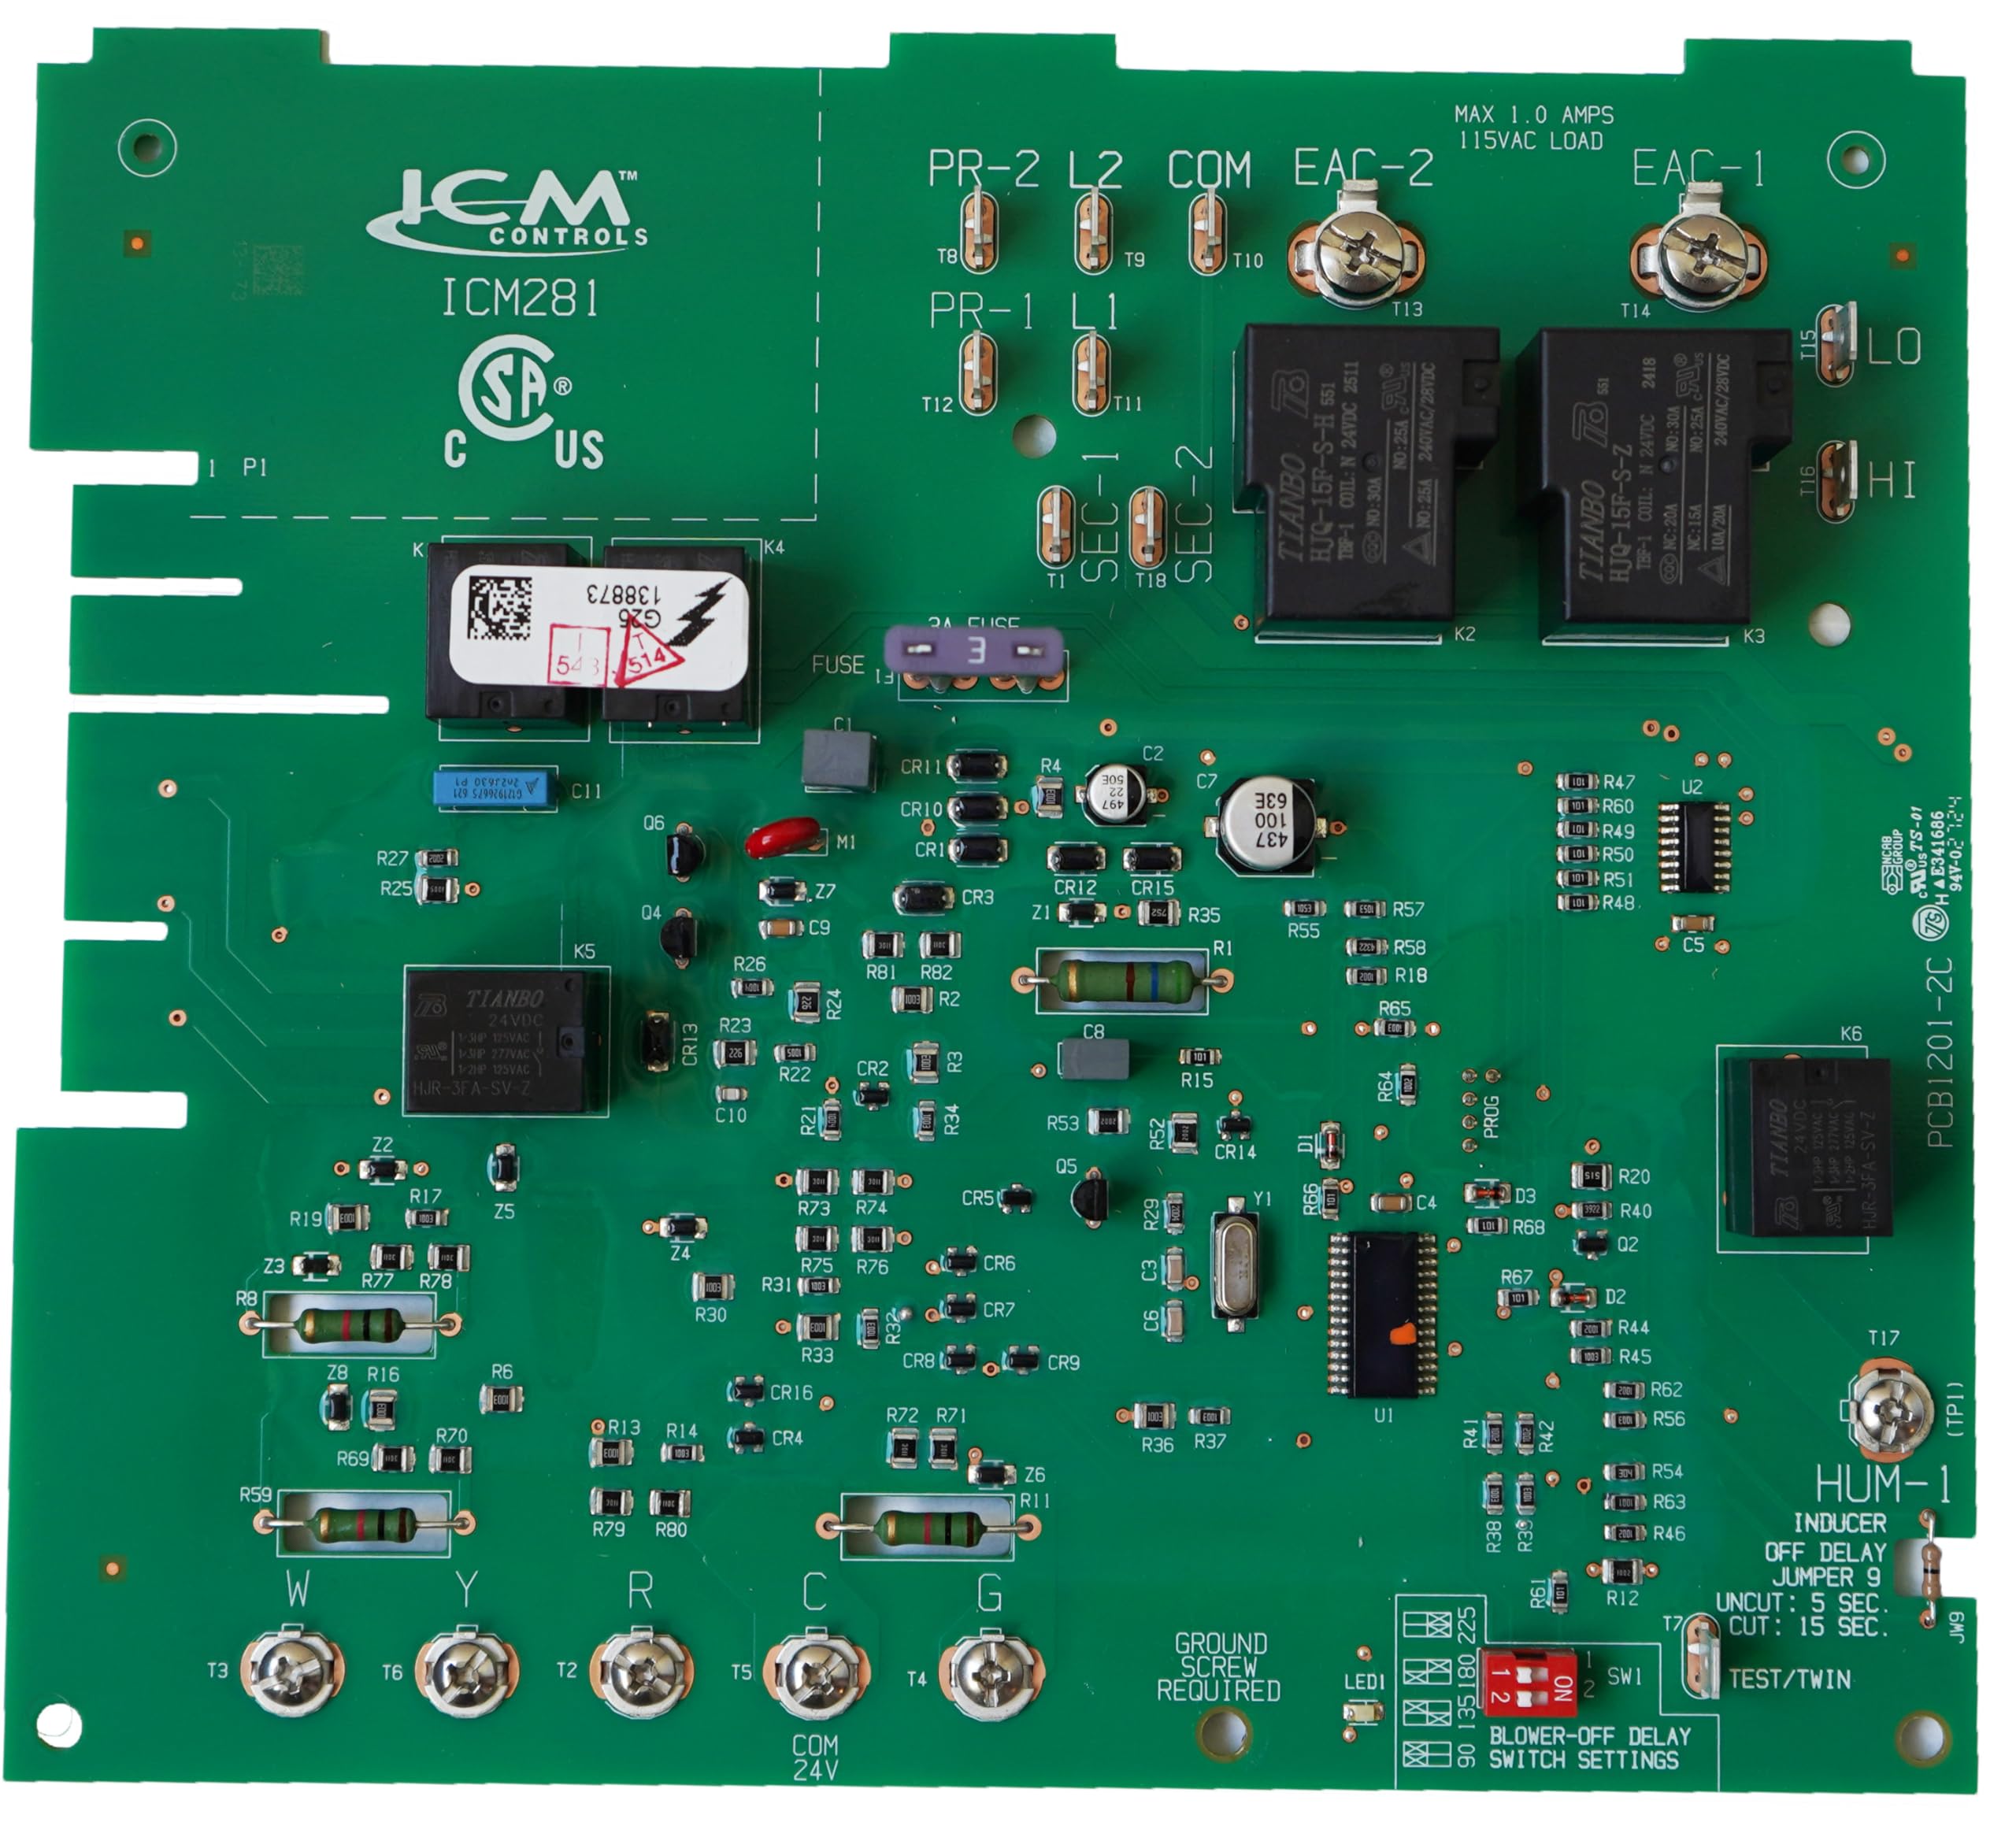
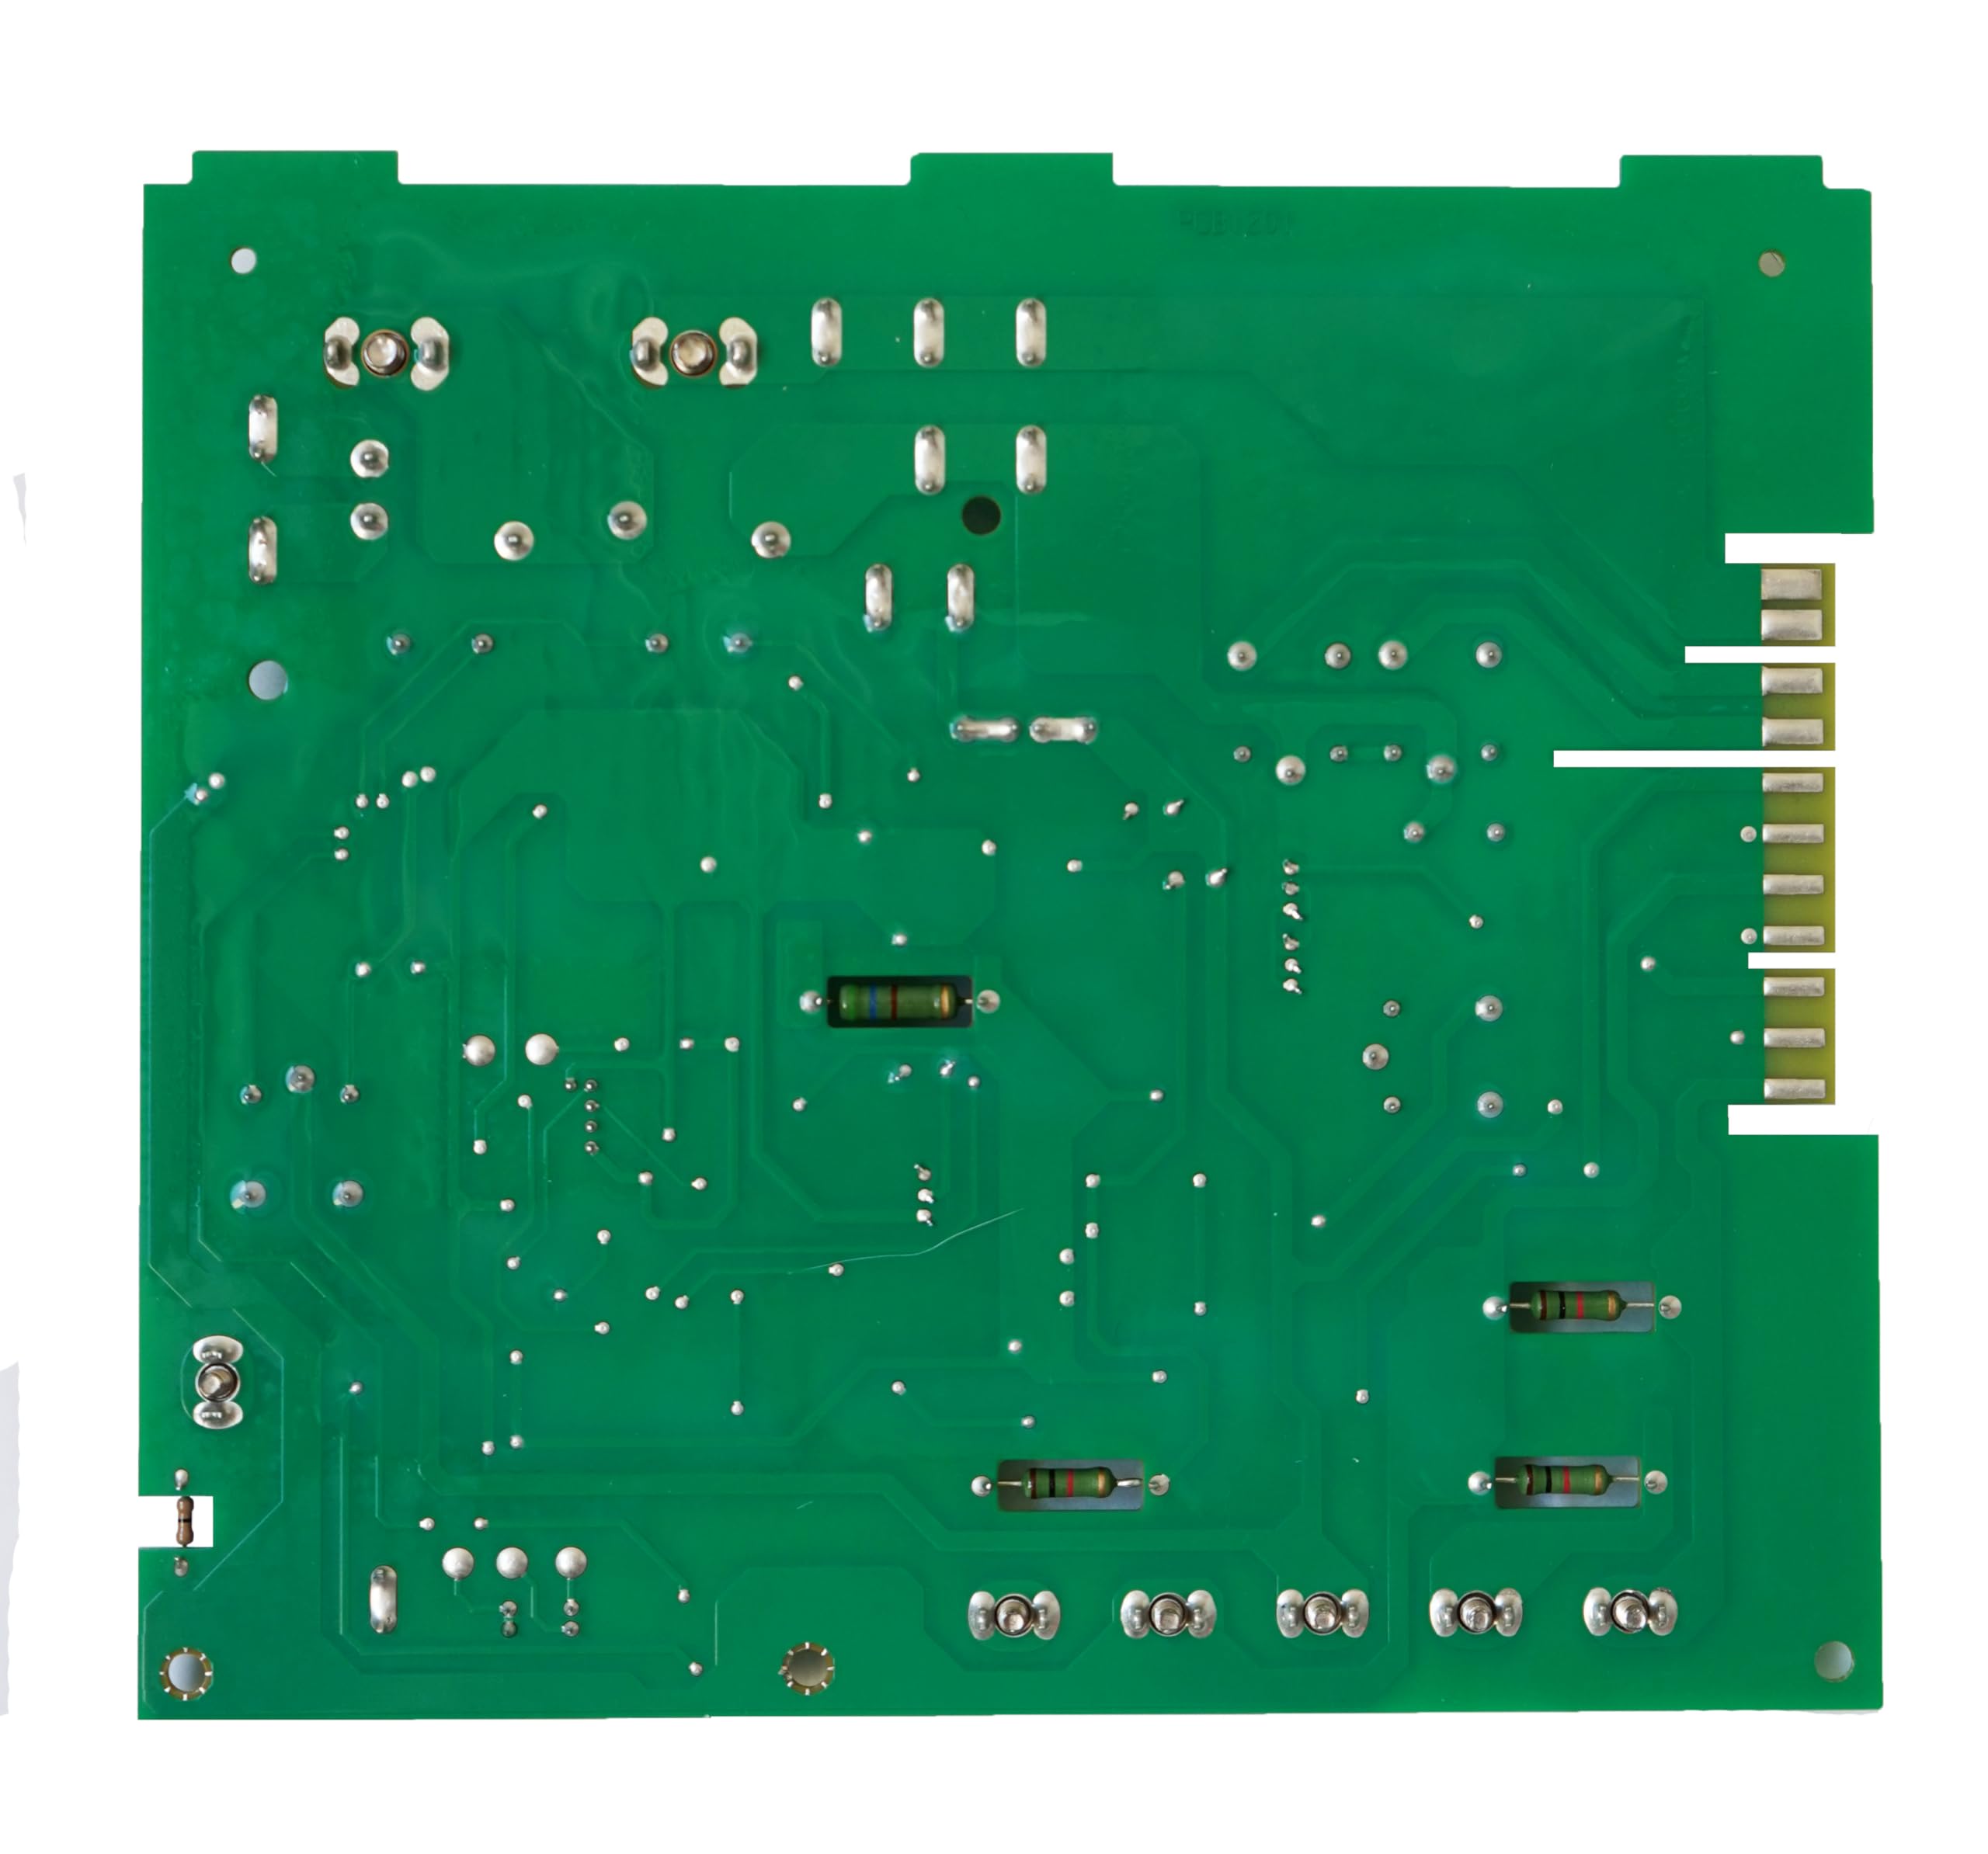
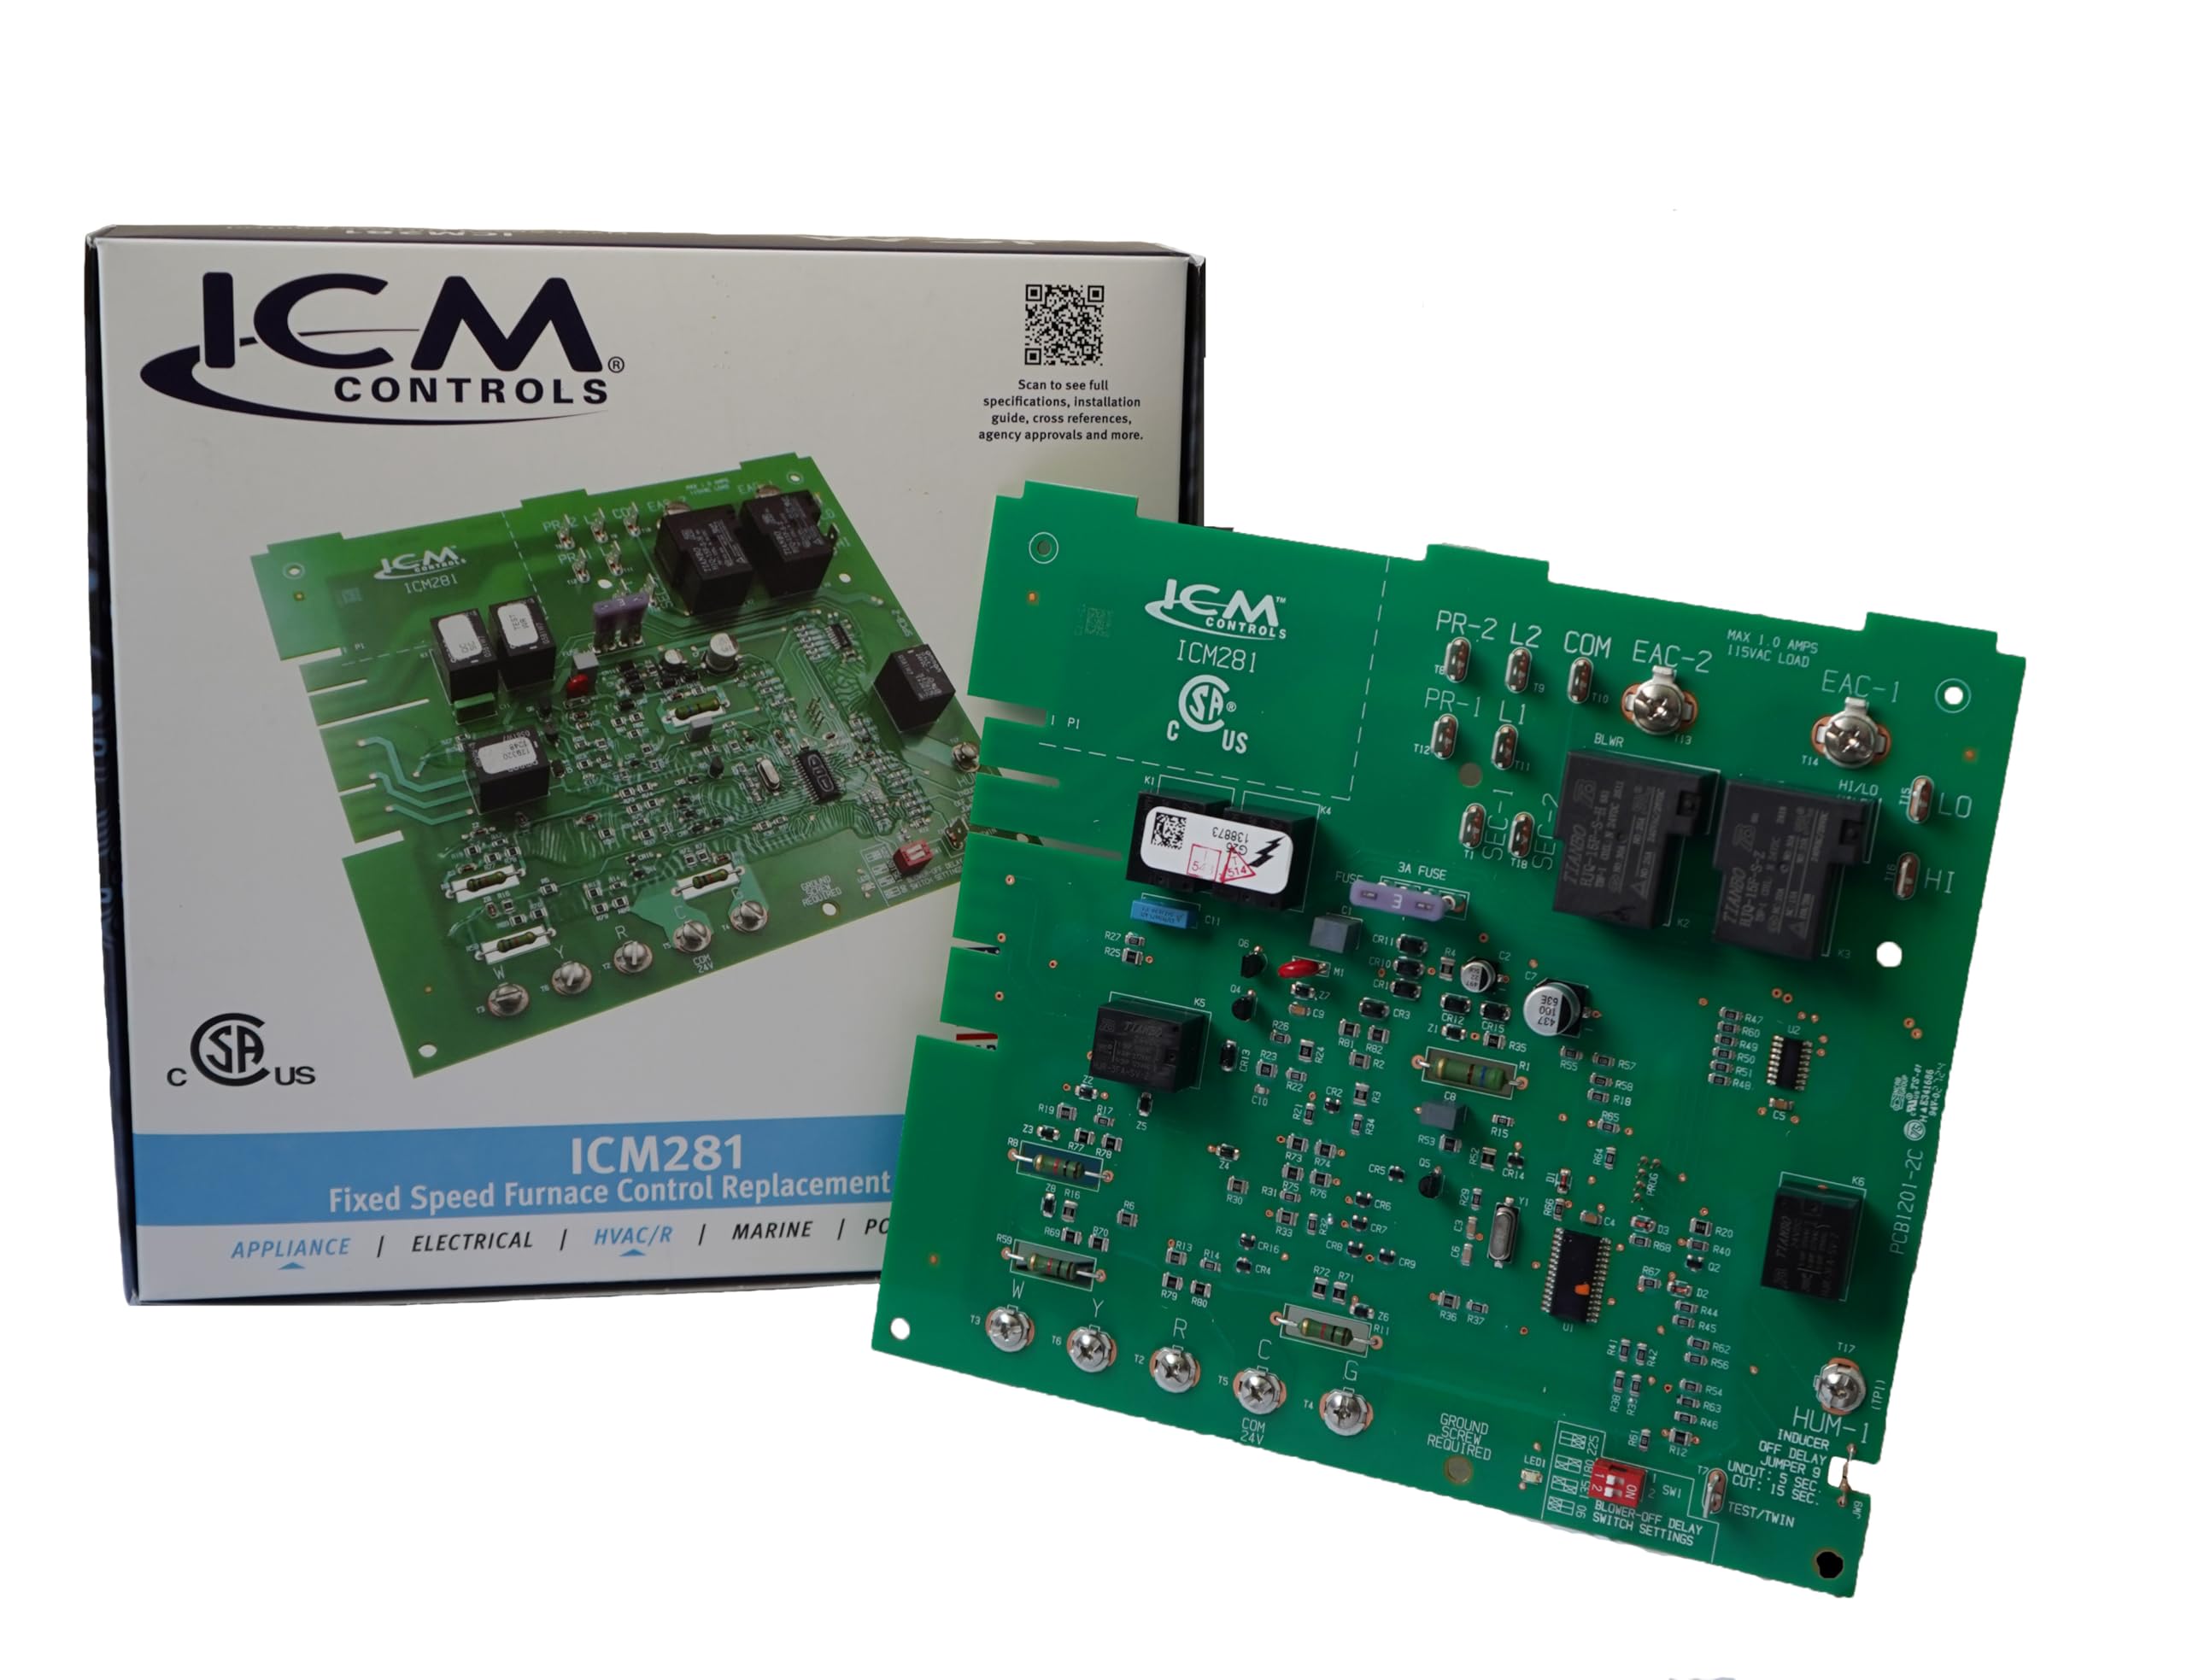
ICM Controls offers a high-performance HVAC control panel engineered for professional-grade voltage compatibility and power handling. Designed to optimize ignition, airflow, and gas valve management, it ensures efficient, reliable heating and ventilation system operation tailored for demanding environments.


I**D
Better than the original and a snap to install
My 23 year old Carrier WeatherMaker stopped opening the gas valve. The draft inducer fan would start and the igniter would glow, but then nothing. My 24v troubleshooting and some research indicated a bad relay or other board component. The bummer was that the original board had no visual error indicator, so I couldn't be sure of the problem.The ICM281 went in without a hitch, and my furnace is running like a champ. Connections are clearly labeled and correspond very well with the original's. One note is that the original board had a wire jumper for the fan cooldown interval, and this one has a dual DIP switch with a printed chart of setting values. Be sure to set it accordingly. Form factor is perfect, and build quality appears to be top-notch (from a layperson's perspective).This product comes with well-written, clear instructions for installation and the pre-use diagnostic check in plain English. It also includes a troubleshooting label card for mounting on the furnace door. For the price, it's a big win for the DIYer looking to keep an older furnace kicking.
Z**M
Works very well!
Purchased the ICM281 CESO110057 for our Carrier 58PAV090. After 22 years of service, our Carrier furnace appeared to be down for the count. Thanks to an assortment of valuable info gathered from various forums and youtube videos, we were able to narrow the problem to a control board issue (cold solder joints) plaguing some Carrier furnaces.-Old Control Board-Basically, the furnace's hot surface ignitor (HSI) would light up fine, but for some reason the main burners wouldn't fire up and after 4 attempts it would go into "lockout" mode and shut the entire system down.We were told that we could restart/reset the system at the thermostat by turning it off and then back on, in order to get it to come out of lockout mode. Well, we discovered that the furnace could still fire up on occasion after approx 4-6 re-starts during the daytime and 9-12+ resets during the cold night. Inconsistent heat is better than no heat, well... not by much.There was only heat if you have the patience to reset it several times and each reset would take approx 5 minutes each to complete. While waiting for the new board to arrive, getting up in the middle of the night to wait for the furnace to start up after each reset was the pits. We did install a WIFI thermostat and an IP camera in order to NOT have to get up by the thermostat to reset it, but this morning it took 23 resets and there was still no heat. Didn't continue because it was time to get to work.-New control board-So this morning we get an alert saying that the control board will be delivered one day earlier. Hallelujah! Sure enough, the board arrived on the porch this evening and I quickly went to work. Unplugged the furnace, unscrewed the various covers, and pulled out the old board. Not too difficult, there are plenty of videos on youtube that give you a good idea of what to watch out for and how to do it. It sort of felt like building a PC, except I actually bothered to label all of the wires just in case I forgot where they go on the new control board.It probably took about 35 minutes of actual work, I took photos of the wiring at every step of the procedure to make sure that I didn't cross wires or leave anything off. Once complete, I double checked everything, screwed the covers back on, and then plugged in the furnace. Turned on the heat and for every second there was silence, it seemed like an eternity. Fortunately, the inducer kicked in, the ignitor started to glow, and to my surprise not long after that, the burners kicked in! What used to take about 5 minutes (x 23 attempts), now took about a minute. Saw beautiful blue gas coursing through the chambers of hte burners. Never thought I'd be that excited about gas, but after several freezing nights, it was a sight for sore eyes.Thank goodness for this new control board, what a relief and what a difference a board makes!
P**N
Just what the Doctor ordered!
My Carrier furnace was having some problems periodically. Often when the furnace would start, the flames would extinguish as soon as the inducer fan shut off and the heat box would not conitnue to be heated during the heat cycle. The same could be seen during the summer, when the compressor would shut off too early in the cycyle, leading to an incomplete cooling cycle. In both cases (heat or cool), the furnace would then run longer than normal (fan on), then would shut off for a very short time, maybe 10 seconds, and start the incomplete cycle again.This control board corrected the problem. Installation was very simple - any homeowner can do this. I recommend this product - it does exactly what it claims to do at a fair price.And for those of you who care - it is made in the USA. To me, this is normally a sure sign of pure garbage, but in this case it signifies a quality product. You are actually paying an American to make a good product when you buy this. NICE!And - if this is being sold through Patriot Supply - excellent merchant! Delivery time was shorter than promised. In fact, I paid for standard delivery and the performance was that of express delivery. Awesome seller!
T**I
A perfect replacement (and better than the original)
My original board was failing to open the gas value (guessing a bad/stuck relay) so I shopped around and discovered replacement boards were considerably more expensive than this one pretty much everywhere else I looked (like 2-3x more). This price seemed too good to be true but I trusted that Amazon Prime would take care of me if it was a dud. I took pictures of the wiring on my old board so I could be sure to reinstall everything in the same places on this new board. Strangely enough, it didn't work--I got a fast blink from the small LED. The instructions mapped this to "reversed polarity" so I simply swapped the two output wires from the transformer and it roared to life. Not sure why I had to do that since they weren't swapped on the old board (and the instructions confirmed my first attempt should have been correct based on the colors of the wires) but it's working fine now. (And yes I confirmed with a multimeter that the white & black 120VAC input wires had the correct polarity--black to ground reads 120, white to ground reads zero.)My old board didn't have the diagnostic LED. If this board didn't have it either I would have given up and returned it as a bad part, but the fast blink and detailed instructions were enough to tell me what the problem was and how to fix it. Still baffled about why the working configuration doesn't match the instructions (and I considered knocking off one star for that), but the board is performing well and I have heat now so nothing to complain about. :-)
Trustpilot
1 month ago
2 weeks ago
3 weeks ago
2 months ago