Desertcart purchases this item on your behalf and handles shipping, customs, and support to Mexico.
💅 Elevate your nail game with salon-quality nude perfection!
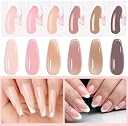
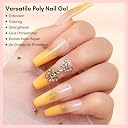
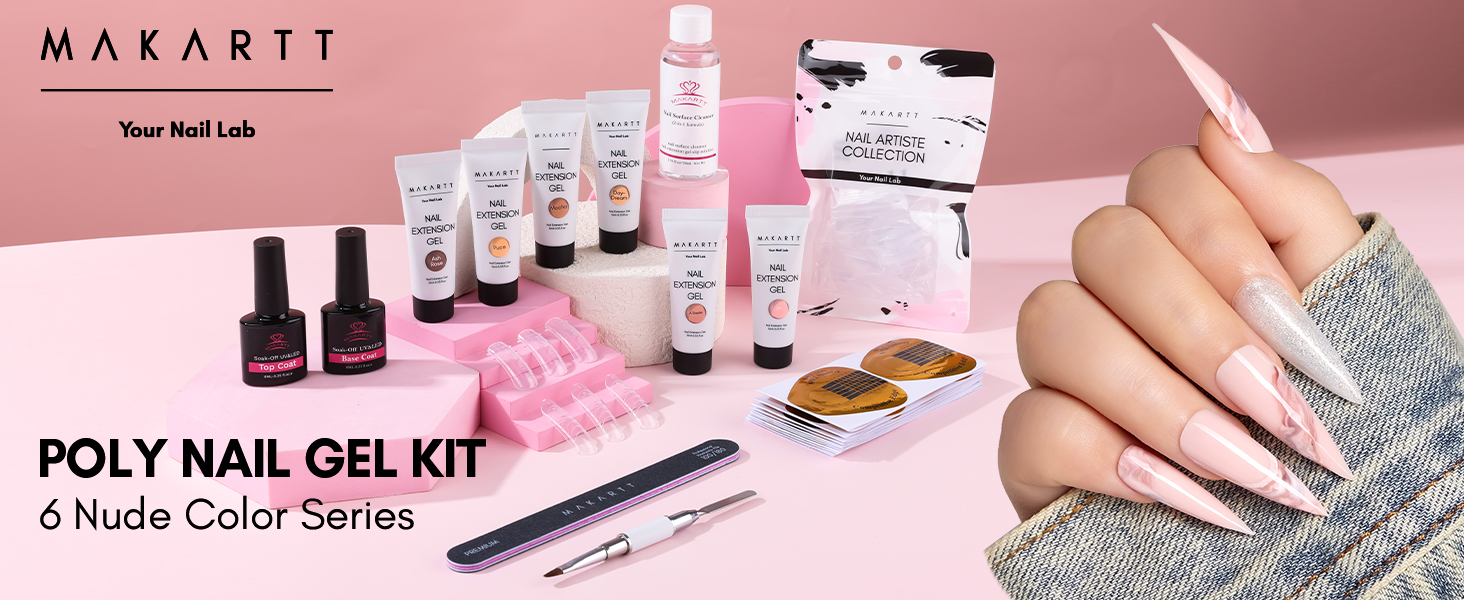
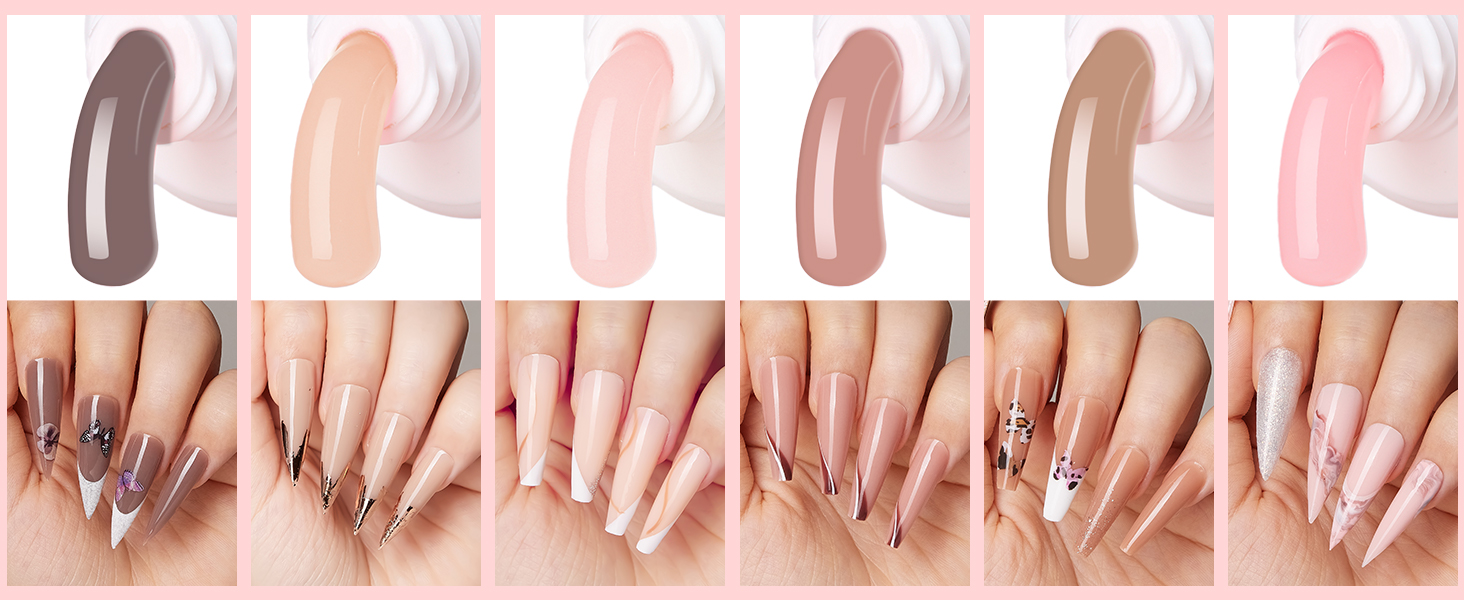
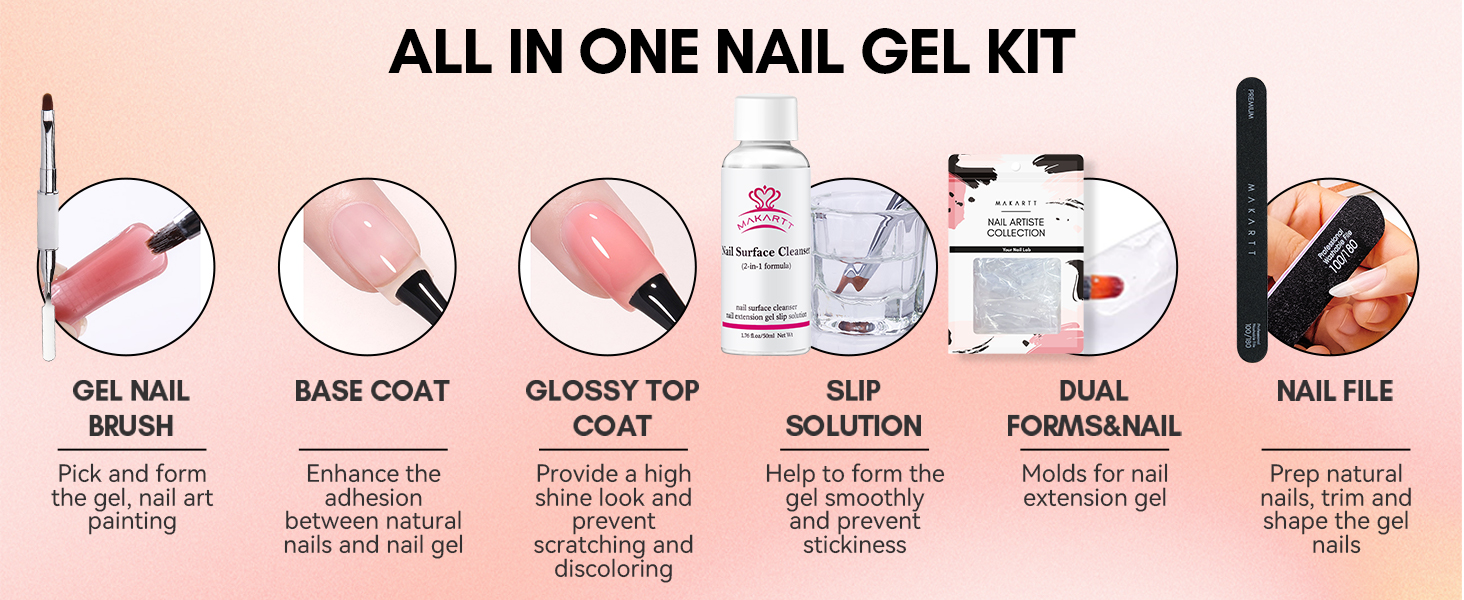
The Makartt Poly Nail Gel Kit offers 6 nude gel shades (15ml each), a 50ml slip solution, base & top coats, plus 60 dual forms in 12 sizes and essential tools. Designed for both beginners and pros, it delivers strong, durable nail extensions lasting up to 4 weeks. Perfect for natural, glossy, or matte finishes, this all-in-one kit supports creative nail art and healthy nail growth.


| ASIN | B086PLJH63 |
| Best Sellers Rank | #18,762 in Beauty & Personal Care ( See Top 100 in Beauty & Personal Care ) #31 in False Nail Gels |
| Brand | Makartt |
| Brand Name | Makartt |
| Color | Nude Colors |
| Customer Reviews | 4.2 out of 5 stars 15,065 Reviews |
| Finish Type | Glossy |
| Included Components | Glossy Top, Nail File, Top Coat |
| Item Form | Gel |
| Item Weight | 49.9 g |
| Manufacturer | Makartt |
| Manufacturer Part Number | P-88 |
| Material | Acrylic Plastic, Paper, Resin, Stainless steel |
| Set Name | Makartt Nude Extension Gel Nail Starter Kit |
| Unit Count | 1 Count |
T**M
Great starter polygel kit
I love this this polygel kit ❤️ This kit comes with base coat prep then used polygel in the nail molds with two different shapes per nail to choice from,put polygel in the molds and to clean prepped nail then put under UV nail light for recommended time, take the gel mold off off the nail and omg you have a premolded nail! It's very easy and the kit comes with top coat as well. The only negative remark is the polygel tube are not very big. My nails usually last 21 days or a little longer before balancing or redoing new polygel color.
H**L
Best Beginners Kit
I ordered this due to seeing a review on Youtube about polygel nail kits. The kit has basically all you could need. After watching numerous videos about the tips and tricks people have used, I'm going to share some that I found very useful. I laid everything out the first time I did this. Took me about 2.5 hours start to finish. Additional supplies I recommend everyone have is slip solution (I used 70% isopropyl alcohol), cuticle pusher and cuticle oil. The slip solution/alcohol is SUPER important because this gel is super sticky. I just noticed some dried bits on my fingers and they are not easy to take off. Tip #1: File down your nails so the base is able to adhere to the surface better. Tip #2: Dip the brush and spatula in the slip solution before taking the product so it doesn't stick to the instruments. This might seem basic but remember that the smaller the nail, the less product it needs. I took too much product on my pinky and less on my thumb. *face palm* Tip #3: Using the slip solution, I patted the gel into the dual form. KEEP THE BOTTOM OF THE FORM thinner and build up the product up, since the gel should be closer/thinner to the cuticle. Tip #4: When pressing the dual form to the nail bed, make sure to put the cuticle side down and press UP so you can avoid air bubbles. I ended up with air bubbles at the cuticle area and the top of my nail between the nail and the cured gel. A lesson for next time but make sure its pressed down well. Maybe hold it down in the lamp? Tip #5: If you get an air bubble at the cuticle and it breaks creating a broken ridge, I just put the polygel on top of the cured gel and sort of molded it into the broken area (like you would do with acrylic) and cured it. Worked for me! Tip #6: When the dual form is pressed to the nail, make sure you turn your hand around and smooth the underside of the form so its smooth to the form before curing! It will make it less plumpy under the gel. Unless you have an Efile which you can file down. Those are all my tips. Wish someone would have told me but I thought I would share. This kit is super easy to use. Nail file is great. I'm going to purchase a separate Efile just because it would be easier than filing regularly. I would totally recommend to a friend! Worth it!
A**Y
Game changer! I love it!
This is a total life changer, ladies! I got tired of acrylic... it takes forever to file manually and it smells! Polygel has no smell... but my favorite part is when you pop off the dual form and its perfectly shaped with a flawless shine! All you have to do is shape the edges. The Makarrtt band is nice... my only complaint is that the gel is not deeply pigmented. I used the dark pink and it's still light in color and somewhat translucent. The other colors are so light they are almost clear.. and the kit doesn't come with the slip solution.... thats my only complaint and why I'm giving 4 stars... but I used rubbing alcohol for a slip solution, which worked just fine. I REALLY hope this brand will sell individual tubes of all the colors! I would love to see mauves, nudes, and browns! Here's a few tips I have: 1: Watch YouTube tutorials! It will help a lot! 2: Take the extra time to fully prep your nails! Trim cuticles, trim, file, and clean under your nails. Remove the shine by lightly buffing the nail surface with a file. Clean with rubbing alcohol and then use a nail dehydrator solution to remove oils. The better you prep, the better chance you'll have of preventing lifting and making your new polygel last a long time! 3: After you cure the base coat in your LED/UV nail lamp (or any gel polish and polygel), there will be a sticky layer. This might confuse you thinking that the gel is still wet or hasn't cured. You have to remove that with rubbing alcohol on a cotton ball or swab. This will also reveal the shine! And don't forget the underside! 4: Put enough gel in the form to create thickness and strength. The thickness should be about the same as when you get acrylics done at the salon. The thinner your polygel layer, the weaker they'll be. But also, don't go TOO thick because your nail LED/UV light won't cure it all the way through. 5: after I place my dual form on my nail, I carefully form the underside just a bit because the gel moves after you put it on. Use a light hand because the nail form can move around easily. 6: DON'T press the dual form too much onto your nail! Product will squeeze out of the side and things will get messy! Use light pressure, just enough to know that the gel has fully made contact with your natural nail! Do not put the form directly against the cuticles! There should be a tiny space in between. 7: Have fun with it and be creative! Polygel is unique and there are so many cute ideas on Pintrest! If this is completely new for you, expect this to take several hours! My nails in my pics was the very first time I did polygel! I spent almost all day doing them but that's because I took a lot of breaks and mom life lol... doing my kids online schooling.. cooking.. cleaning... but I think it would've taken probably 2 hours straight without interruption. Anyway, in my opinion, polygel is KING... and acrylic is the peasant. They're just as strong but so much prettier and easier to do than acrylic!
A**R
Amazing product, beautiful results!
This product is AMAZING! I have been doing my own nails since 2004. I’ve used acrylic, gels, wraps but never polygel. After watching some YouTube videos, I decided I wanted to try it out and see if I liked it. I was sick of all the work it takes to do acrylic and with a baby in the house, didn’t want to strong smells that come with it. I decided on the Makartt brand, and I am so happy I did! PROS: • comes with 6 polygel colors • the dual forms come in a wide variety of sizes, unlike other dual forms I have tried. • the brush/spatula are great quality • the polygel itself is very easy to work with! You can play around with shape and positioning of the gel as long as you want. It will not harden until placed under a lamp and cured. • polygel is softer than acrylic. So the filing/shaping process is so much faster and easier. As my first time using this type of gel, I used too much and my nails came out too thick. So I had to file them down. What would have taken me hours of filing with acrylics, took me minutes with the polygel. • no harsh chemical smells! HUGE positive! • comes with the base and top coat. And the top coat is AMAZING! My husband commented immediately that my nails look so much shinier and clear.... that’s because of how amazing this top coat is. CONS: • doesn’t come with a slip solution so make sure you have either some slip solution or isopropyl on hand. You will need it to dip your brush in to keep the polygel from sticking to the brush/spatula. Definitely helps make the forming process much easier. • although you do get 6 different colors, the tubes are very small. Not a huge con at all since it’s a starter kit. But if you prefer one of the colors over the rest, you will have to buy a bigger tube. Again, not a deal breaker. Just worth mentioning. • doesn’t come with a light. So if you do not have one you will need to purchase one. Again, not a huge deal. There are tons of reasonably priced lights out there. All in all, this is a great kit. I will definitely be purchasing from this company again. There are tons of videos on YouTube of people using this company’s product, and they all love it. And I can see why!
A**A
Not easy, make sure you have a good UV light
Definitely not easy, It was very sticky and thick. At first it was too cold and hard to work with and then it was too gooey and sticky even with the liquid. The broken nails are the first time i tried, and i don't know if the UV light i have is just a cheap (probably, bought it from wish) but it took from 8pm to 1am to do both hands. It does take practice to know how much gel you'll need or they come out too thin and break fast. The broken nails pic was taken during my lunch, 4 hours into the day. The plus side was that the nails came off fairly easy, i only had to file a couple but they were really easy to file manually. The second set i started at 8pm and had them cured by 12am and just finished shaping them this morning. I think it took so long because I had to cure them for like 6minutes each and they were still not fully cured. One of the thumbs came off this morning and had to cure the gel nail by itself on the underside and then i just glued it on like a fake nail. I still am not able to shape the bottom of the nail good as the gel tends to stick to the bruh wether i use the liquid or alcohol, and it starts to become thin. So i definitely need more practice. Now to see how long they last. EDIT: i ended up taking them off by the end of the day. I think i need more practice and an electric nail filer and a good UV light. One of them broke midday, and the rest were too thick to work with.
H**D
Wow. Super beginner creates amazing nails!
*FILL UPDATE* 2.5 weeks later* SO two weeks later I did a fill and it was very easy! Turned out great! You really need an efile to work with this stuff but I had no lifting or anything. The crystals stayed on pretty well too, only lost 1 or 2 and that was easy to fix with nail glue ❤❤❤ the dark pink is such a pretty color! ****** So I used a more expensive kit before this and I did not like the colors as much as I like these. This is my second time doing any nail extensions and LOOK AT THEM. I get complimented wherever I go! People are asking me to do their nails! It is crazy and I am in love! I need nail extensins because I tend to pick at mt fingers until they bless without them (not cute when working with kids). But I am also in Grad school and am poor, so I can't afford to get them done all the time. This is a great solution and I am over the moon! I recommend using tips AND the dule forms if you are a beginner and not in school or anything. The poly gel is easy to work with but people go to school to learn how to shape and apply nails, so don't be naive like I was and think you won't need every trick in the book to help you out. I also recommend going on youtube and watching tutorials on how to use the poly gel with tips and dual forms as well as how to shape your nails (that's the hardest part). Also, from one beginner to another, learn how to prep your natural nail properly. LongHairPrettyNails and NaioNails are some awesome places to start on youtube. Things I uses with this kit to help me: - dust mask - file (they have some $30-40 if you are on a budget. Just make sure it plugs into the wall) - cuticle clean up drill bit (learn how to use it first) -round drill bit - pH bond - nail tips - brush on glue - cuticle pusher - 71% alcohol (For prep and slip solution) - good light - lots and lots of time and paper towels - LED/ UV lamp (obviously) - extra 100/180 grit files - buffer Optional: - crystals - crystal placement tool (wax on one end, stick on the other) I will update in a few weeks when its time for a fill. This stuff is awesome for a beginner who is willing to research nail care ❤ So happy so far!
A**R
Not worth it :(
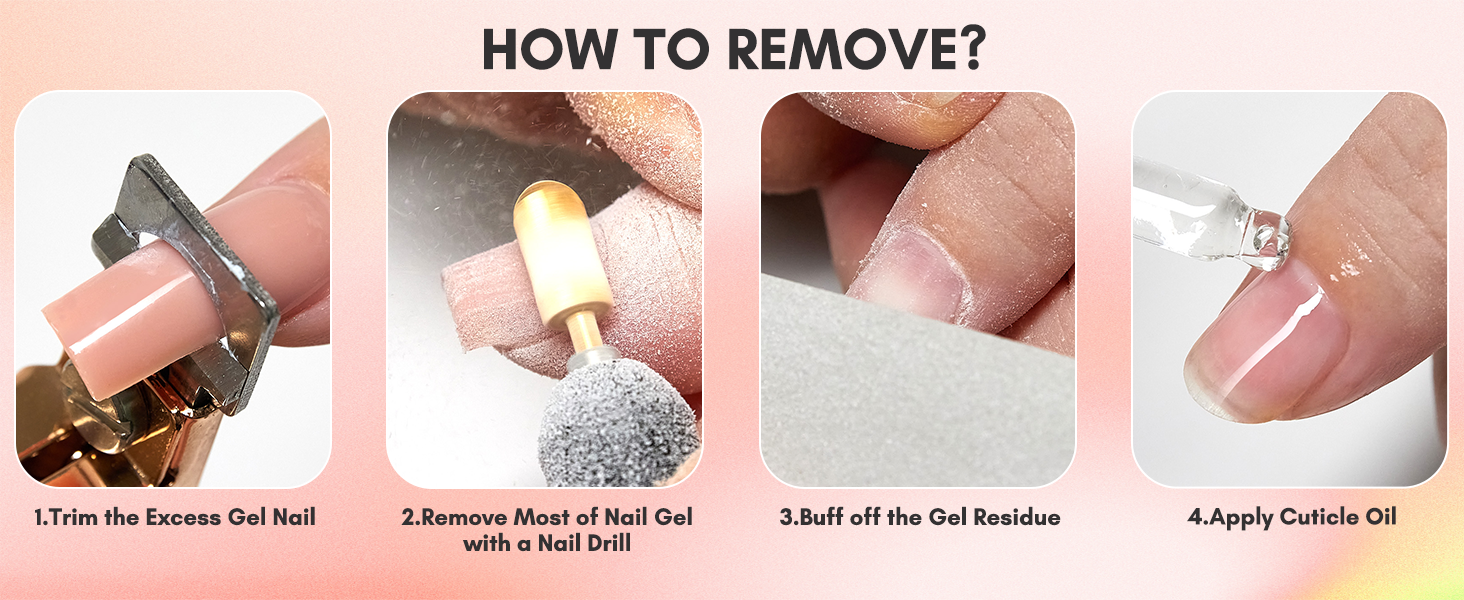
Was so excited to try this method after watching all the online videos but it took me 3 hours for one set and another 2 hours for removal. I usually grow my natural nails out and do 5 coats of soak off gel polish but wanted to go for a jelly nails/see through design. The gel had tiny bubbles before and after curing which really defeated the purpose of being able to do jelly nails. If you have any nail growth you will definitely be able to see it through all the colors except the white. Using 91% alcohol is too strong and will leave white cloudiness underneath and 70% has the same effect if you touch the brush to the gel too many times. This doesn’t leave much room to manipulate the product especially if you are sculpting them to be really long as you would with stilettos. They were thoughtful with the brush and the plastic tube it comes in because once it gets sticky it’s so much effort to remove. Very aggravating if you like to keep a clean station. Be aware that wiping the gel off of the spatula or anything that it gets on is tricky with one hand, have plenty of paper towels/lint free wipes and alcohol ready to go right in front of you. Duals forms come sorted sizes 0-11 in a plastic case. The dual forms fit my middle through pinky fingers great but my pointer fingers and thumbs which are more curved and flatter respectively were so hard to fit side wall to side wall. Also the curve on my thumbs were so off even after I filed and shaped both my nails and the dual forms prior. Would have been better off free-handing with a paper nail form. The 2 hour removal...here we go...I used an e-file and the provided hand file from the kit then a warm acetone soak. You definitely need a particle mask and dust collector machine or at least do the filing outside. This would be a huge mess for the average consumer and if you make a mistake on one nail it would be such a pain to remove it and fix it, I was extremely careful not to. I used three coats of soak off gel basecoat since I didn’t want to file close to my natural nails and I am so thankful I did. I would be cringing at the removal if I had to scratch any of my natural nail plate which happens no matter how professional you are. The polygel just gets soft and bendy in acetone if you were wondering, must be filed paper thin to make removal go faster. To sum it up- pretty colors and if you already like Makartt Polygel get this. Otherwise the application and removal is too much of a hassle and I don’t see myself taking the time to perfect it. Also my nail beds would be crying if I did this with back to back removal and application. Makartt should include paper nail forms or more dual form sizes for flatter/smaller nail beds. Decided to not post a picture because the bubbles are embarrassing. Worst set I’ve ever done. I would return this if I could.
P**A
Life changing for brittle nails
I received this product last night and I have not been able to stop playing with it. OK so I have the worst Nails anyone could ever have they are tiny and brittle and in order for them to look Decent I always have to get acrylics done. now because they are so tiny and Brittle it’s always so painful when I get to the salon and get my nails done not just that it always doesn’t turn out like I want it. It hurts like hell when shaping my nails at the salon or even cleaning it or just getting a simple manicure. Not to mention because they are so tiny the acrylics don’t even hold onto all my nails. at least one Nail comes off within a week and more than that or all of them within two weeks.I feel so unattractive without fake nails and I get so much confidence from having beautiful nails. The colors in this kit are so beautiful that they make my nails look natural and healthy and beautiful and it takes literally less than 15 minutes to do them all by myself. The colors in this kit are so beautiful that they make my nails look natural and healthy and beautiful and it takes literally less than 15 minutes do you do them all by myself. now I have only had them on for for a Day but I will update as weeks go by as to how long they last. But you know what, even if they last me two days I am totally fine with doing it every other day doing my nails every other day because first it is so relaxing to do it with this kit and second it takes such a short time it is totally worth it for the look you get. I have read some reviews that say that the GEl is really thick and tacky and hard to manipulate around the trick to that is to use isopropyl alcohol . Although not many reviews talk about that over here but I saw that on YouTube and that is a very important step to do that is to move the gel around on the form With the alcohol. Then you go ahead and put it on your finger and place it int then you go ahead and place it into the LED for 90 seconds and you are done. This is seriously life-changing for me I really don’t really like to write reviews but when something is so significant and make such a difference in your life you kind of owe it to write a review. Besides things included in this kit you really needed the alcohol and the LED light. Just buy the alcohol from a dollar store and get a cheap LED light on Amazon that’s all you need. The base that is included with this kit really helps the nail to stick to the nailbed and it does a great job on my nails that don’t even like adhering to acrylic So the base is a really important step and do not skip it. I do not know how I did not know about poly gel’s for so long because they have been out for a while. well I am glad I accidentally stumbled upon them while looking for Nail Tips and now my life has changed forever and I will never go to a salon again or buy nail tips again because none of it last on my fingers or even looks good. So here’s to my future pain free and beautiful nails all year long
E**A
Muy buena calidad, incluso para uso habitual
Markartt es de las mejores marcas que he usado en gel de uñas. Este kit no solo sirve para iniciarse, también es muy buena opción para tener unos básicos de buena calidad. Los geles se aplican fácilmente, se nivelan bien y curan sin problema en la lámpara. El resultado queda bonito y bastante duradero si se trabaja correctamente. En general es un kit muy completo y con buena calidad de producto, tanto para empezar como para quien ya hace uñas y quiere tener unos básicos fiables.
S**A
Funcional e fácil de utilizar
Em poucos minutos, realizei está unha. Gel fácil de moldar e de limar. O acabado não é super perfeito, mas serve. Quanto à resistência só o tempo o dirá.
M**A
Einfach Top!
Der Versand war schnell.. gestern kam das Set an und am Abend hab ich es bereits ausprobiert. Anfangs war ich skeptisch aber es hat von vornherein gut geklappt! Die Qualität des Gels ist super und auch der Base- & Topcoat haben mich überzeugt. Die Oberfläche der Nägel ist gerade.. die Ränder relativ sauber und der Topcoat glänzt schön.. bei anderen Produkten hatte ich bereits das Problem, dass die Schichten sich nicht richtig ausgehärtet haben oder ich meine Hand teilweise länger als 5 Min. unter die LED-Lampe halten musste.. hier aber ging alles schnell.. Schicht(en) aufgetragen, 2 Min. unter die Lampe und die Sache war erledigt... Also Daumen hoch für die Qualität! Auch das Material wie der Pinsel, Cleaner, ... sind top! Mit diesem Set schauen meine Nägel zum ersten Mal ohne viel Aufwand wie aus dem Studio aus... ☺️ Bin begeistert..
S**E
Great bit of kit 💅🏽
Really hard to work with at first but once you get the hang of it super easy! I received my set on the 20th feb i done a set straight away, they were a bit scruffy and lasted a few days then i took them off (bit them off 😂 gross i know definitely not recommend) anyway i done another set (vid) a little longer in length and i thought they were going to snap immediately but nope still going strong and look great. So far lasted around a week so far. Happy✌🏼🙃 Also.. Make sure the brush is wet but not dripping with the slip solution i just have a little cotton pad to dab it on.. And when applying the form to your nail don't press down too hard as the product bulges out, if it does just clean it with the brush and solution (before curing) or file or use a drill 🤷🏽♀️ Whatever x
S**E
marblelishes
Very easy to use makes great marble patterns when using it on your nails. I would like to try the other colours
Trustpilot
2 months ago
2 months ago