โจ Weekend Upgrade: Granite Glam Without the Guilt โจ
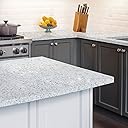
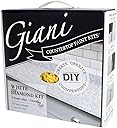
The Giani Granite Countertop Paint Kit in White Diamond offers a budget-friendly, eco-conscious way to transform outdated countertops into a bright, high-gloss granite look. Designed for indoor use on a variety of surfaces, this low VOC, water-based acrylic kit covers up to 35 sq ft and dries in 16 hours. It includes all necessary tools and minerals for a professional finish, making it the perfect DIY solution for millennials seeking stylish, durable kitchen upgrades without costly replacements.
| ASIN | B00BMU9QMK |
| Age Range Description | Adult |
| Brand | Giani |
| Brand Name | Giani |
| Color | White Diamond |
| Colour | White Diamond |
| Container Type | Pail |
| Coverage | 35 square feet |
| Customer Reviews | 4.4 out of 5 stars 5,501 Reviews |
| Dry Time In Hours | 16 |
| Finish Type | High-Gloss |
| Finish type | High-Gloss |
| Full Cure Time | 16 Hours |
| Global Trade Identification Number | 00891056001482 |
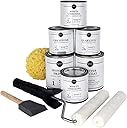
| Included Components | 12 oz. IronCore Primer-Base Coat, 16 oz. Glitter Topcoat, 4" Giani Paint Sponge, 6 oz. Greystone, 6 oz. Quartzite, 6 oz. White Limestone, 6" Giani Roller Arm and 2 Roller Pads, 8 oz. White Limestone, Brush, Practice Board |
| Indoor Outdoor Usage | Indoor |
| Is Waterproof | True |
| Item Form | Aerosol |
| Item Type Name | Kit |
| Item Volume | 16 Fluid Ounces |
| Item Weight | 5.89 Pounds |
| Item volume | 16 Fluid Ounces |
| Manufacturer | Giani Granite |
| Model Name | Paint |
| Model Number | White Diamond |
| Paint Type | Acrylic |
| Part Number | FG-GI WHT DI |
| Size | 10 Piece Set |
| Special Features | Odor Blocking |
| Special features | Odor Blocking |
| Specific Uses For Product | Tile,Countertop |
| Surface Recommendation | Ceramic |
| UPC | 891056001482 |
| Unit Count | 1 Count |
| Water Resistance Level | Waterproof |
A**R
Great Value. Easy to Apply. Impressive Results!
We recently renovated a 200 year old farmhouse. In the main kitchen and bar areas we used a dark brown "coffee" colored granite. To the side of the kitchen is a large, walk-in pantry. We painted out its cabinets in white but the kelly green laminate countertops didn't fit with the rest of the kitchen. Because we removed the pantry door, we wanted a continuous theme. Rather than trying a dark brown counter top which would have made the pantry feel too enclosed and small, we went with the Giani countertop paint kit in white diamond. I was pretty skeptical. I'm not an artist, nor a painter. I followed the directions and began by painting the green counters black. This made me nervous, but I kept going. I layered on the paint colors using the sponge. I learned fairly quickly how important it is to let the paint dry between coats. If you're painting the white on the black and the black is still wet you'll end up with a blurry grey finish. Layer by layer, the counters came alive. My skepticism began to fade. The individual paint canisters give you a lot of freedom to customize the final finish. I used less of the warm beige color and stuck with more of the greys and whites. The final step with the gloss was easy. The counters dried quickly. They looked great. My family couldn't believe it. The most honest recognition of a great job came from our contractor who arrived the following week and asked when I arranged to have marble counters go into the pantry. I touched the counters, studied them and couldn't believe it was just paint. Even our painter came to take a look and was amazed. My recommendation is to pay close attention to the tops of backsplash. Prepare well by using lots of frog tape to protect walls from any splatter or smudges. I highly recommend this product. For a very low price and a few hours you can turn old, ugly laminate into something pretty dazzling! Good luck!
J**K
It is very workable with clear instructions
The first picture is a before. Last year I layed feathering concrete over an ancient countertop that was made of (cracked) tiles that were uneven. After painting it and protecting with polyurethane it looked like the first pic, which was a massive improvement. But it didn't look very real and it yellowed and stained within the year. So I sanded it and used the Giani kit to get the new look. I should have probably made it lighter, but I felt it was looking pretty realistic when I added some veins with a small brush, so I left it at that. I'm really pleased with the result and am considering making it more durable by adding an epoxy layer when it is fully cured. It is also very forgiving, since I never managed to get the feathering concrete a hundred percent flat, having put it over a surface that was very uneven to begin with. Now it looks pretty flat. So full marks for this kit, I recommend it.
N**N
Speedy delivery of a fabulous product. Thankyou.
I used this product on a very old mission brown laminated benchtop. And once i got the hang of it i found it easy enough to use. I am a little fussy so i did go back over a couple of sections with the third colour first to even it out and second to lighten the result. I did feel that there wasn't any difference between the second and third colour. They both appeared to be limestone white? All in all im very happy with the result.
T**S
Amazing Results
In my search for a Counter Transformation Kit, I found Giani had just as good reviews as another brand. The bonus was the price difference was SIGNIFICANT. I had to purchase two Giani Kits (each kit covers 35 sq. ft and I had 70 sq. ft to cover). For two Giani Kits, on Amazon, I paid less than one kit by another brand. Approx. $70 less and I didn't have a lot left over. Ok - onto the application. I am female and this was my first ever attempt at something of this magnitude. Yep - I made a few mistakes but Giana makes it easy to correct. With your preferred color, you are able to customize how much of the three colors you want to have. I found I used the desert sand color the least. Overall, the process took a good two days. I would definitely make sure you do not have any distractions while applying any of the steps. Put on some music and get in the groove. I've had a ton of compliments on my transformed countertops. They turned out amazing and look just like granite. Some comments I've received are: "I can't believe you did this yourself; it looks professionally done." " Your countertops look just like granite countertops." "I am amazed at how well this project turned out." And those are just a few I can remember. My biggest challenge was at the 90 degree angles and the ledge where the countertop met the back splash/wall area. It was rather difficult to get in that area without smudging the paint I had just put on. I tried a number of different techniques to make it all look like the same kind of pattern. Perhaps there is a "pencil like sponge" available someplace but I ran out of time looking for one. If there is such a thing, I would highly recommend getting a few if you use the transformation kit. Image a rather small, probably 1"x1" or less sponge on top of a pencil, and that would likely work better for the tight spots. I recommend this product to anyone who asks. I live in AZ and my Aunt in IA continues to ask my dad how I did it; I think she might try it. Happy Countertop Transformationing.
H**C
Good product, good instructions, still a lot of work
I was considering new counter tops and stumbled upon this product and thought, what the heck. For about $100 vs. thousands, I could have a new look in my kitchen. We are several years away from a full renovation, so this product seemed a dream come true. And it is, for the most part. The pros: - inexpensive - good communication with the company--they responded to a question here on Amazon and they replied to my email to the company within one day - the kit is straightforward - the company has video tutorials that are mostly good, you can also find tons of blog posts from people who've applied the product The cautions: - there is not enough limestone paint in this kit if you choose to do an additional layer, as I did. I have a tiny kitchen, two counter tops that are about the length of my arm-span. even with following the instructions, I was scraping the bottom of the can. I wish I ordered more, but I didn't, and I couldn't have my kitchen in disarray any longer than it was, so I did do a final coat of white using Behr from Home Depot. I know this is a no-no according to the company but time was of the essence. AND I must say I'm glad I used the Behr because I rather like the look. but if you want to stick with the Giani, do yourself a favor and order extra paint. - the roller is crap. I did not like the look of the top coat using the roller, so I did the second and third coat entirely with the foam brush and I like the results. that said, the top coat is not like an industrial coating you'd get with counters you purchase. it isn't as "glassy" as I would like, but it's good enough. - there are cautions about cold weather application. I live in NY and took my chances. I wonder if this affected my top coat application. I may do an additional coat in the summer time to see if it improves appearance. - my counters have some curves (not all right angles) and I found sponge application most challenging on these surfaces. I used a combination of the sponge-on-pencil trick Giani suggests in their instructions and just using a small piece of sponge in my fingers, being careful not to smudge with my hand and this was hard. - I am artistically inclined and I found drawing the veins to be nerve-wracking. I like the end result, I went for a more muted marble look. - I found it difficult getting around the faucet and sink hose. if you can remove your sink, probably ideal. I could not. - dry time between coats make this longer than a weekend project, be aware. then you also have to wait three days before using your counters and putting your coffee maker back, stuff like that. and two full weeks before heavy appliances like stand mixers. I would use this product again, but I hope I don't have to!
Trustpilot
3 weeks ago
1 week ago