Description
🚀 Elevate your IT setup with power, flexibility, and style!
- COMPLETE SETUP KIT - Includes all essential accessories for quick, hassle-free assembly and grounding.
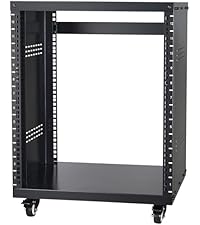
- MOBILITY ON DEMAND - Equipped with smooth-rolling casters for effortless relocation and workspace optimization.
- HEAVY DUTY STRENGTH - Supports up to 500 lbs ground load, ensuring your critical IT equipment stays secure and stable.
- DUAL MOUNTING VERSATILITY - Free-standing or wall-mounted design maximizes space in any professional environment.
- FLEXIBLE DEPTH ADJUSTMENT - Fits a wide range of servers and AV gear with 23-40'' adjustable depth for ultimate customization.
The VEVOR 12U Open Frame Server Rack offers adjustable depth from 23 to 40 inches, supporting up to 500 lbs when ground-mounted. Crafted from durable Q235 carbon steel, it features a versatile 4-post design with casters for easy mobility and can be wall-mounted to save space. Ideal for professional environments, it comes with a full accessory kit for quick assembly and reliable grounding.